Forensic analysis of MITRE ATT&CK Techniques 4 - Credential Access
In the previous blog Forensic analysis of MITRE ATT&CK Techniques - PART 3 the third phase of the adversary was explained. In that phase an adversary managed to ensure persistence on the system, creating the local account and placed a malicious shortcut in the Startup Folder. Looking at the MITRE ATT&CK framework, the next goal of an adversary is to use techniques to steal credentials like account names and passwords
PART 4 - Credential Access
In this phase of the attack, an adversary uses various techniques for stealing credentials like account names and passwords. Techniques used to get credentials include keylogging or credential dumping.
Credential Access Techniques
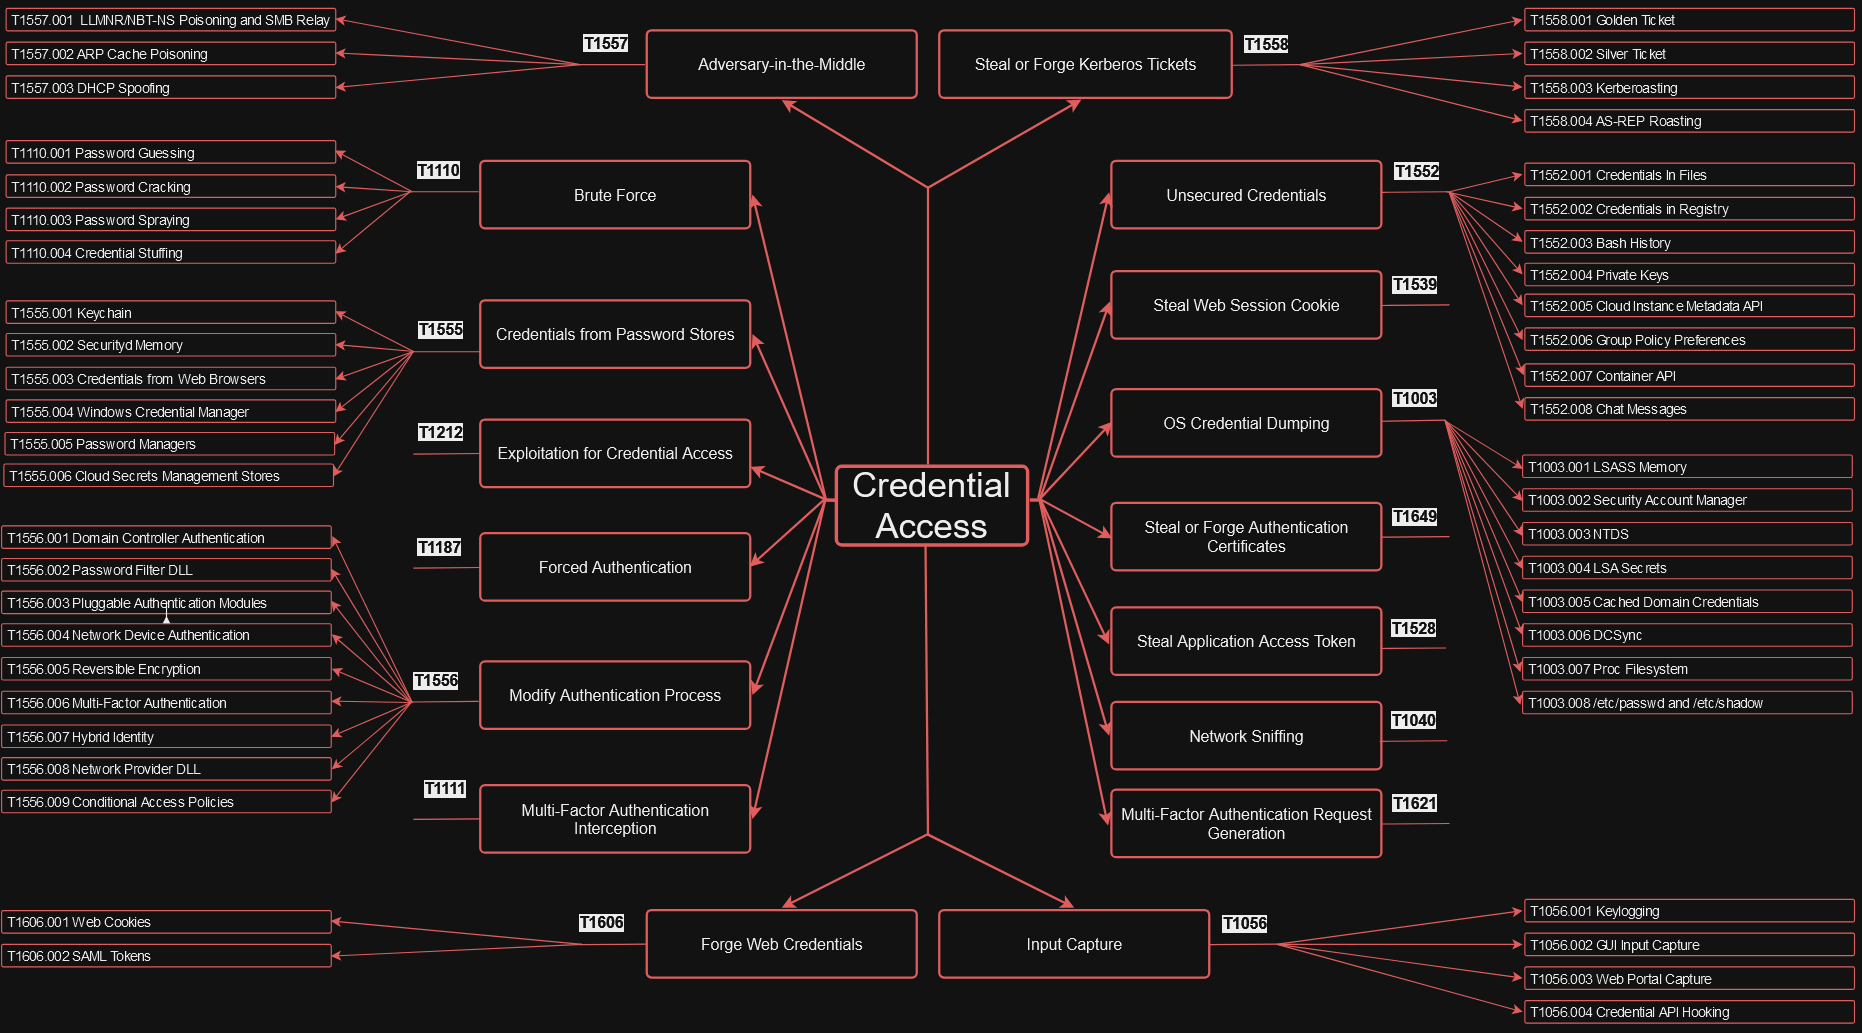
Figure 1. Credential Access Techniques
This example will show technique, T1003 OS Credential Dumping, Sub-technique T1003.003 NTDS in which an adversary copied an Active Directory domain database in order to steal credential information and information about domain members such as devices, users, and access rights.
Sub-technique **T1003.003 NTDS**
The Active Directory database is stored in a single NTDS.dit file which is stored by default in location C:\Windows\NTDS\Ntds.dit of a Domain Controller. NTDS file stores and organizes all the information related to objects in the domain, including user account details, passwords, group memberships and other object attributes.
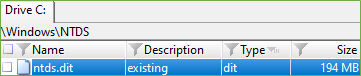
Figure 2. Location of the NTDS.dit file
The NTDS.dit file is logically separated into the following partitions:
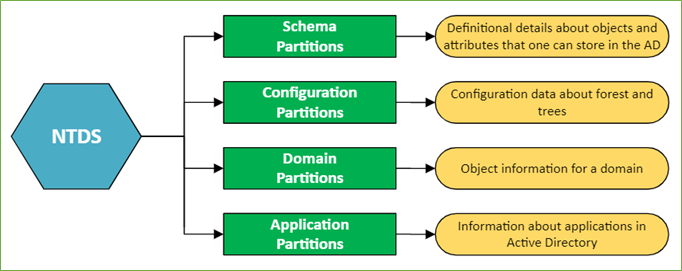
Figure 3. NTDS.dit Partitions
Adversaries use various tools and techniques to enumerate the NTDS file and the contents of the entire Active Directory hashes. In the picture below are some of them.
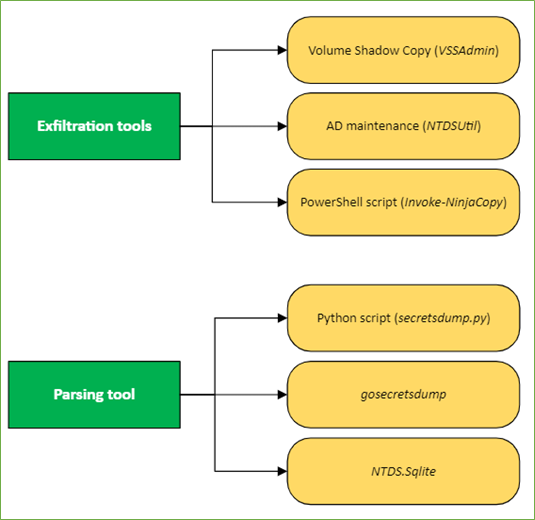
Figure 4. Exfiltration & Parsing tools
In this example an adversary uses the wbadmin utility to create a backup of NTDS.dit file. The wbadmin utility is a command line utility built into Windows OS and enables backup and restore of operating system, volumes, files, folders, and applications. Because the Active Directory locks NTDS.dit file while running, an adversary used wbadmin utility to exfiltrate that file.
Detection analysis
To use the wbadmin utility on Windows Server 2012 R2, which is in this case, the Windows Server Backup component must be installed. That can be accomplished using the Server Manager or PowerShell command Install-WindowsFeature -Name Windows-Server-Backup.
In this case, according to the evidence, an adversary opened the PowerShell a few minutes before running a wbadmin utility.

Figure 5. PowerShell Opened - $MFT

Figure 6. PowerShell Started – Microsoft-Windows-PowerShell.evtx
That’s mean that an adversary executed a PowerShell command to install that component. This is proven by the Windows Server Backup.xml file which was created after that.

Figure 7. Windows-Server-Backup.xml Created - $MFT
After that an adversary executed the wbadmin utility and the evidence shows that the backup process is started.

Figure 8. wbadmin Executed - $MFT
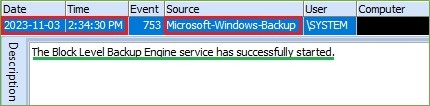
Figure 9. Backup Started – Microsoft-Windows-Backup.evtx
After some time, the log Backup-03-11-2023_14-36-07.log was created. That log shows what an adversary was copied. In the picture below, we see that an adversary created backup of the NTDS.dit and SYSTEM files.
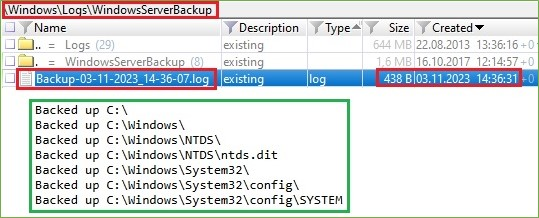
Figure 10. Backup “NTDS.dit” and “SYSTEM” files
Finally, the backup was created in the form of Microsoft’s Virtual Hard Disk (.vhdx) file with the .xml configuration files. The wbadmin utility saves the backup in a WindowsImageBackup folder on the target drive.

Figure 11. Backup Created – .vhdx File
When we looked inside that .vhdx file, we found the NTDS.dit and SYSTEM files.
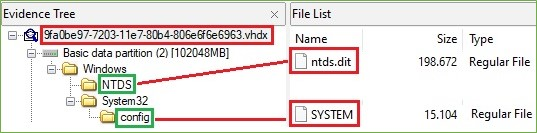
Figure 12. .vhdx Content
The BackupSpecs.xml file contains the backup specification.
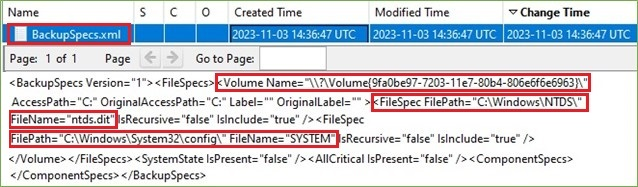
Figure 13. Backup Specification
From that backup specification file and the location of the .vhdx file, we can conclude that an adversary used the following wbadmin command to achieve his goal:

Figure 14. wbadmin Command
Why does an adversary also copy SYSTEM file?
In the NTDS.dit file everything is encrypted, so an adversary needs that local SYSTEM file if he wants to decrypt. The SYSTEM file contains critical system configuration information, including sensitive data such as cached credentials, and secrets used by the operating system. With that file an adversary can decrypt password hashes stored in the database.
What can an adversary do with this?
By extracting these hashes, an attacker can conduct offline cracking attempts to obtain plaintext passwords to gain further objectives or use techniques like Pass-the-Hash attacks.
How can an adversary do this?
In this blog, we are using Impacket Python script secretsdump.py to show how an adversary can extract hashes from the NTDS.dit file. The command for that is:

Figure 15. secretsdump.py Command
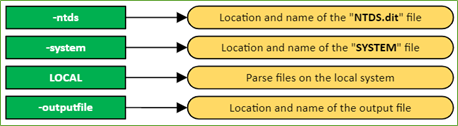
Figure 16. Command Description
When we executed that command, the hashes will be extracted. In the picture below we can see formatted NTLM hashes for the users.
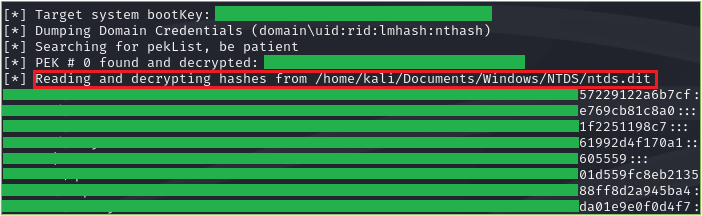
Figure 17. Extracted Hashes
Now, an attacker can use cracking tool like Hashcat or John the Ripper to crack the hashes and obtain the plaintext passwords or use techniques like Pass-the-Hash.
In this blog, we are using Hashcat tool inside the Kali Linux distribution to crack the hash. Before we started with the cracking hashes, we need to know what type of hash we are dealing with. Common hashes include MD5, SHA1, SHA256, etc.
In this example, we are using the hash-identifier tool to identify the hash. In the picture below we can see that the hash that we want to crack is MD4.
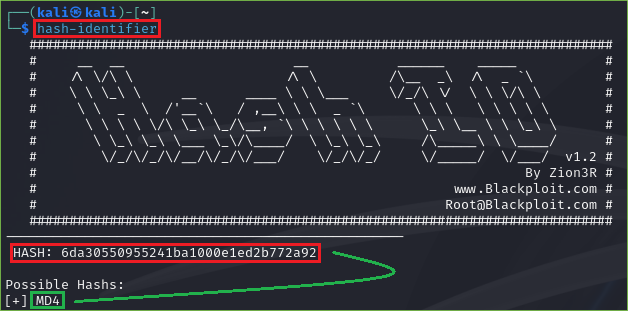
Figure 18. hash-identifier Tool
Now we can execute the Hashcat command using dictionary mode, and the cracking will begin.

Figure 19. Hashcat” Command
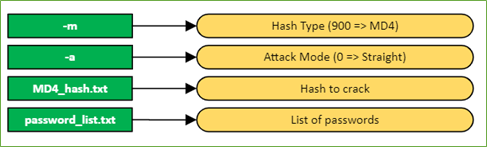
Figure 20. Command Description
In the picture below we can see that the password after cracking the hash is FreedomForAll.
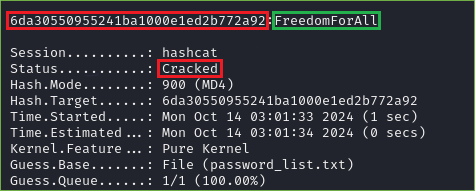
Figure 21. Hash Cracked
Conclusion
An adversary managed to steal credentials like account names and passwords in a way that he used the wbadmin utility to copy the NTDS.dit and SYSTEM files. Access to both files can give an adversary a comprehensive view of the Active Directory environment and enabling them to launch sophisticated attacks against the network. This might include data breaches, account takeovers and the establishment of persistent access.

on October 8, 2024